Hack The Box - RogueOne Solution
Incident response and memory forensics walkthrough for the Hack The Box RogueOne Sherlock challenge using Volatility 3.
I’ve recently dedicated some time to delve deeper into the realms of hacking and incident response. While this field is expansive, and each individual has their preferred learning method, I’ve discovered that Hack The Box (HTB) aligns best with my learning style. My reasoning behind this preference is that, unlike many other platforms, HTB strives to simulate real-world issues more closely. By tackling challenges on HTB, one acquires skills directly applicable to real-life scenarios. This sets it apart from Capture The Flag (CTF) competitions, which often lean more towards resembling problems found on platforms like LeetCode.
The initial challenge I tackled was RogueOne. Here’s the problem statement:
Your SIEM system generated multiple alerts in less than a minute, indicating potential C2 communication from Simon Stark's workstation. Despite Simon not noticing anything unusual, the IT team had him share screenshots of his task manager to check for any unusual processes. No suspicious processes were found, yet alerts about C2 communications persisted. The SOC manager then directed the immediate containment of the workstation and a memory dump for analysis. As a memory forensics expert, you are tasked with assisting the SOC team at Forela to investigate and resolve this urgent incident.
The problem provided a 1 GB memory dump that required analysis. I utilized Volatility 3, which as far as I know, is the most widely used tool for such tasks. If there’s a superior alternative, I’d welcome suggestions in the comments. It’s worth noting that the default unzip tool in Windows failed to extract the file without requesting a password; however, when I opened the zip file with PeaZip, I was prompted for a password. If anyone has insights into this issue, I’d greatly appreciate any comments on that too.
Our initial task is to pinpoint the malicious process and input its process ID. Our primary approach involves identifying all processes engaged in outbound communication with the C&C server. Typically, knowing the IP address of the C&C server serves as a clear indicator. However, as the IP is not provided here, we must rely on alternative clues. We proceed by executing the following command.
vol -f 20230810.mem windows.netstat.NetStat > outputs/netstat.txt
Let’s dissect this command. vol refers to the volatility3 program. The -f argument specifies that the subsequent argument will be the input memory dump. In volatility2, one would have to specify the profile for memory analysis, but in volatility3, this is defined through the plugin name. The next argument, windows.netstat.NetStat, denotes the plugin to be executed, which outputs the list of connections in the system or memory. The final set of arguments, > outputs/netstat.txt, redirects the output to a file named netstat.txt within the outputs directory. This setup aims to preserve artifacts, anticipating multiple analyses on the output, which might take considerable time to generate depending on the system.
First lets take a look at first couple of lines of output.

In this output, we observe various lines indicating connections marked either as ESTABLISHED or CLOSE_WAIT, alongside some denoted as LISTENING, which becomes evident upon scrolling down further.
Given the emphasis on active connections in the problem statement, we’ll narrow our focus solely to those marked as ESTABLISHED. This will be accomplished using the following command:
grep -n "ESTABLISHED" outputs/netstat.txt
grep is the tool used for text search, and the -n argument directs it to display line numbers. "ESTABLISHED" denotes the pattern we’re searching for, while the last part simply represents the filename. The resulting output is as follows:

Things are starting to get intriguing! We’ve observed four instances of the svchost.exe application connected to the internet. Among these, three are linked to port 443, while one is connected to port 8888. While this method isn’t foolproof, my initial speculation is that port 443 is likely normal and used for HTTPS, whereas the service connected to port 8888 should be regarded as suspicious. However, before reaching a final conclusion, let’s delve into what svchost.exe actually does. According to lifewire:
The purpose for svchost.exe is to, as the name would imply, host services. Windows uses it to group services that need access to the same DLLs to run in one process, helping to reduce their demand for system resources.
This seems innocent. However, it’s important to note that malware developers often use innocuous names for their programs to camouflage among legitimate and necessary components. Therefore, let’s delve one step deeper. We’ll attempt to examine other processes in the system by using the following command to retrieve the list of all running processes.
vol -f 20230810.mem windows.pslist.PsList > outputs/pslist.txt
As before, we’re preserving the outputs to a file for multiple analyses. Next, we’ll search for svchost.exe in the file.
grep -n 'svchost.exe' outputs/pslist.txt
A segment of the output is as follows:
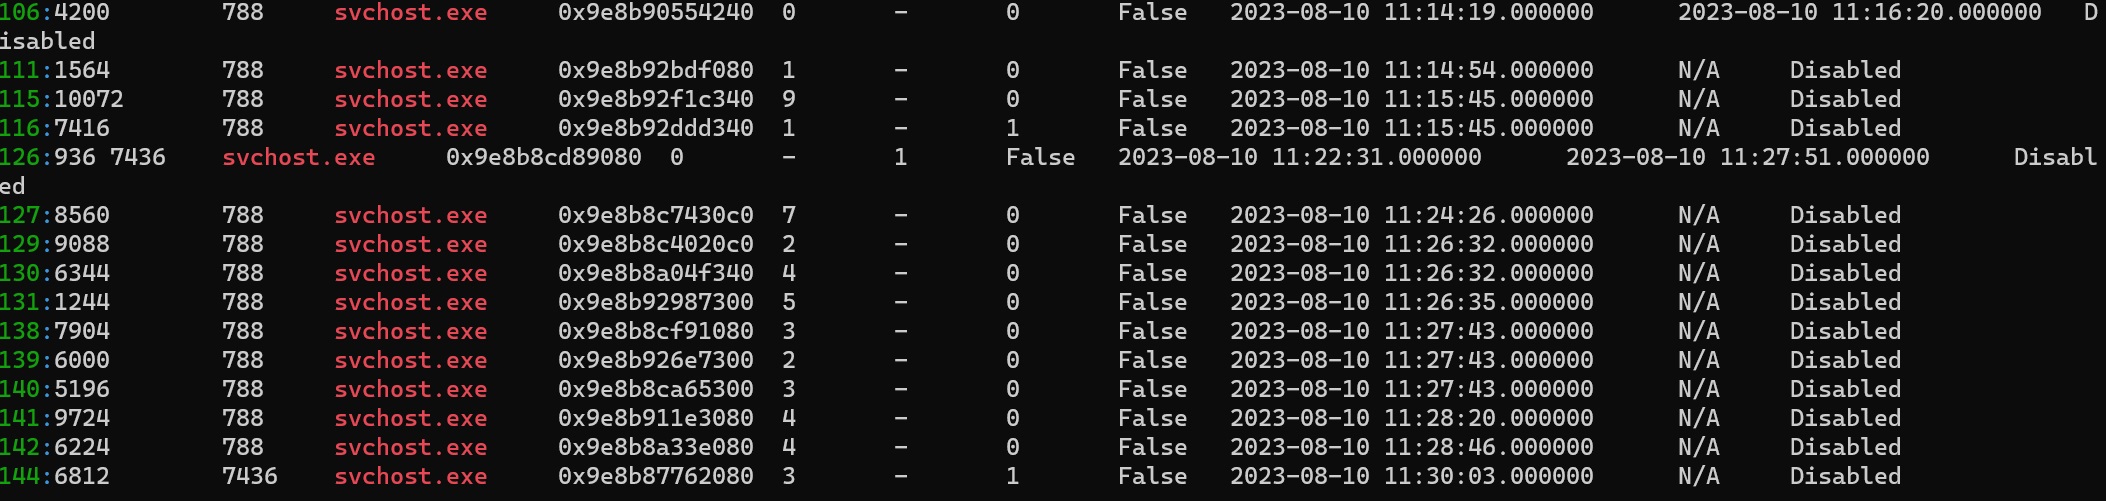
We discover something very interesting here. Except pid 6812 and 936, all other processes have pid 788 as the parent. For these two, the parent is pid 7436. Let’s try to search more details of the pid 788 and 7436. For pid 788 we get a large number of results, so let’s try to look at only the first one, as we are interested in the process itself, not it’s childs for now. For 788 the command is:
grep '788' -m 1 outputs/pslist.txt
And it’s output:

For 7436, the output is:

With this analysis, we can confidently identify our malicious process ID as 6812. The rationale behind this conclusion is that while services.exe is a common service responsible for launching svchost.exe, explorer.exe typically corresponds to the Windows File Explorer. Hence, pid 6812 stands out as the malicious process. Therefore, the answer to task 1 is:
6812
For Task 2, which entails finding the process spawned by the malicious process, we apply the same approach as before and execute the following command:
grep -n '6812' outputs/pslist.txt
We get this output:

Our result for task 2:
4364
The next task asks us to find the md5 hash of the malicious program file. To get the malicious program from memory we use the following command:
vol -f 20230810.mem -o 6812 windows.dumpfile --pid 6812
Here -o defines the output directory, --pid 6812 defines our targeted pid and the other argument is name of the plugin used. The output is as follows:
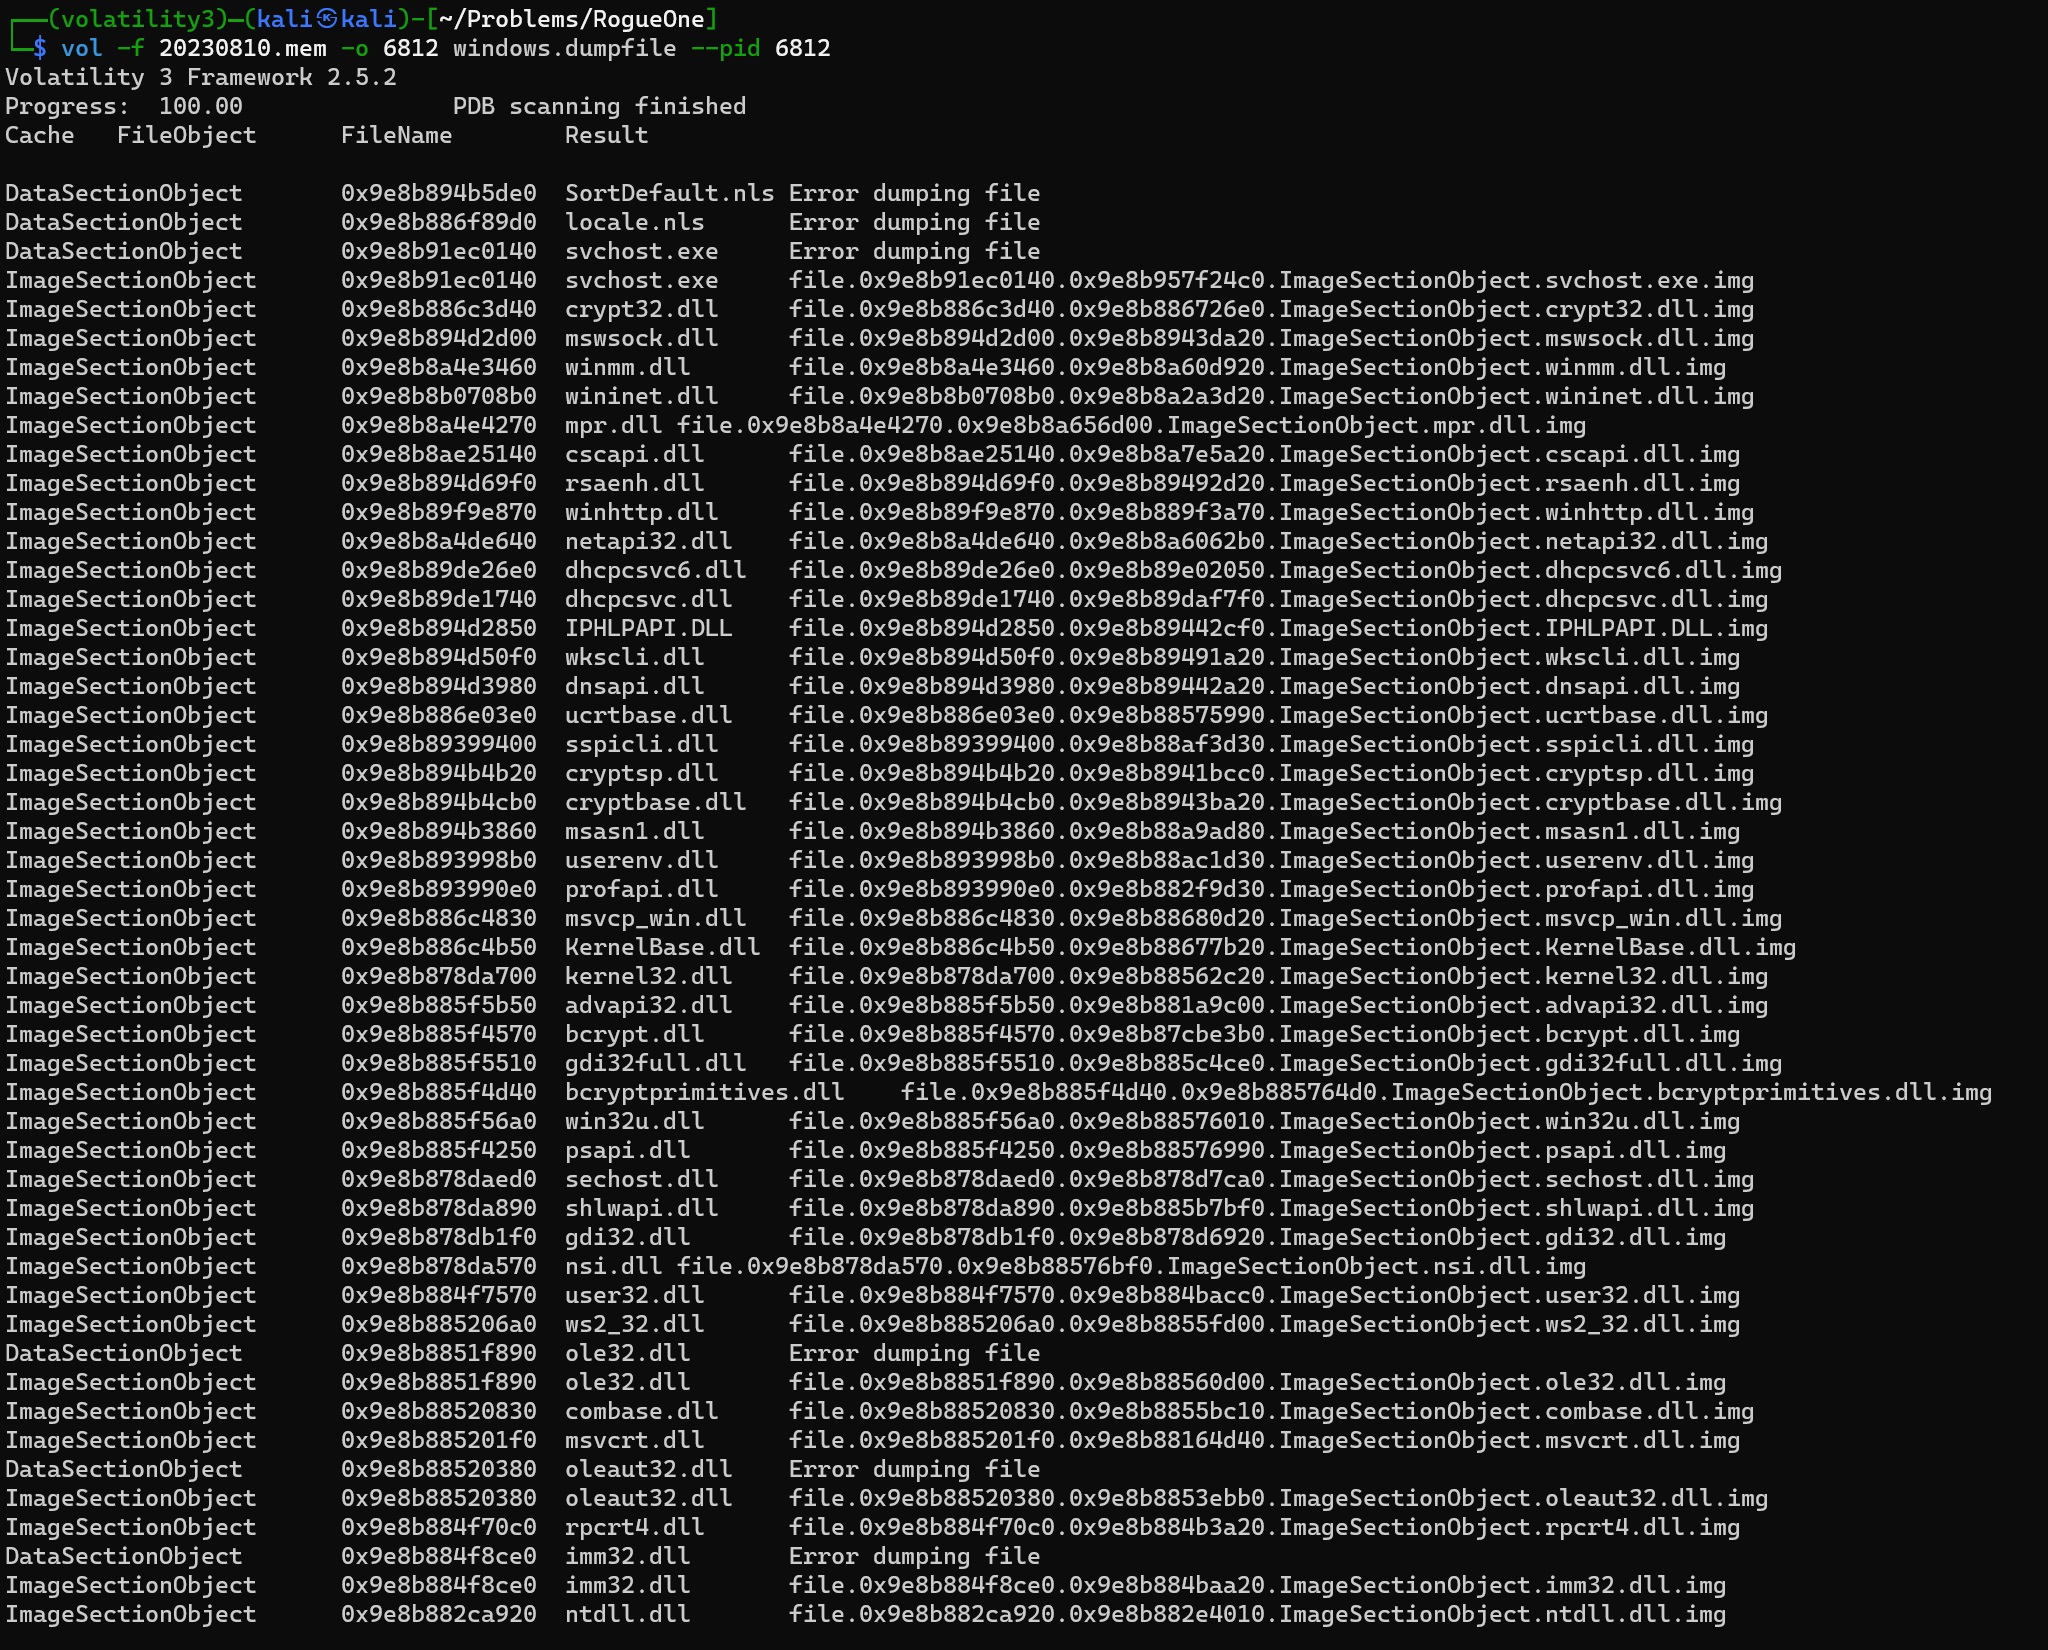
While we can see a lots of dll files as output, for us the most important one is file.0x9e8b91ec0140.0x9e8b957f24c0.ImageSectionObject.svchost.exe.img. Running md5sum on the file we get our result for task 3:
5bd547c6f5bfc4858fe62c8867acfbb5
For task 4 we were asked to provide the C2 IP address and port. We can search on netstat.txt to find the result for this. The command we can use is:
grep -n 6812 outputs/netstat.txt
The output:

Result for task 4:
13.127.155.166:8888
As for the time the connection was established, we can get that from previous output.
Result for task 5:
10/08/2023 11:30:03
We are asked for memory offset of the malicious process in task 6. To get that, we run:
grep -n 6812 outputs/pslist.txt
Result for task 6:
0x9e8b87762080
For task 7, we were asked to submit it to virustotal and determine, when it was first submitted. After submitting we get that the file was first submitted on August 10, 2023 at 11:58:10. The result for task 6:
10/08/2023 11:58:10
And voilà, the problem is completed!